I’ve been using WordPress for a little while and whilst its generally very good at what it does I do get frustrated by limitations in the editor.
The two things I miss the most are being able use tables and to set styles such a “Quotation”, “Note Callout” in the same way that you do in something like Microsoft Word so you can keep the look consistent across the whole blog.
(Note you should use existing markup like Paragraph, Heading 1…2..3, Quote etc when suitable as it helps with SEO)

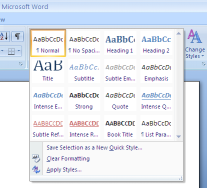
Choosing a style in Microsoft Word
This is all quite easy to do using CSS and classes – but you have to start editing the HTML manually and I want to make it easy for non-technical users when editing a post.
TIP – Keep your sanity and NEVER paste documents from Word into WordPress (even using the Paste from Word cleaning tools) . If you look at the HTML generated it will be full of useless cruft that will make trying to apply a consistent look a nightmare.
The editor WordPress uses is called TinyMCE, but it hides some features from view for simplicity. You can use other editors such as CKEditor (see FCKEditor wordpress plugin) but for this article I am going to use the Tiny MCE Advanced plugin to allow you to use the full feaures of the TinyMCE editor.
The rest of this post will walk through installing the TinyMCE Advanced plugin so if you are fimiliar with this then feel free to skip to Better Formatting with WordPress Part II where I will cover how to setup your own styles and give some examples that you can use.
Installing the TinyMCE Advanced plugin to your WordPress blog
Note this is for WordPress v2.8, other versions may be a little different
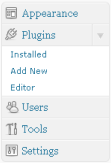
|
 |
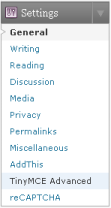
Now choose which extra features we want in the editor by selecting Settings > TinyMCE AdvancedYou can add controls you want by dragging them to the menu bars and remove ones you won’t need. Its tempting to add everything, but you probably won’t need a lot of these and it will just make it harder to find the important stuff.
Buttons I removed
|
 |
Buttons I added
- Visual Aid
- Table Tools
- Styles
- Quote

One final note – don’t select Import the current theme CSS classes in the CSS classes in most themes are not designed to be used for your editing. Doing so will just fill up the Styles dropdown with lots of useless entries.
 Don’t select this option!
Now onto Better Formatting with WordPress Part II where we learn how to define our own styles and go through some examples.
Tags: WordPress

You can have more fine-grained control over the buttons you want available. For instance, you can remove the H1 and H2 tags from the formatting dropdown list. Details here sligo web design blog – customising tinyMCE